podman
最佳实践
ubuntu
podman 在 linux 上的最佳实践 Installing podman 5+ on ubuntu older versions
- apt install podman
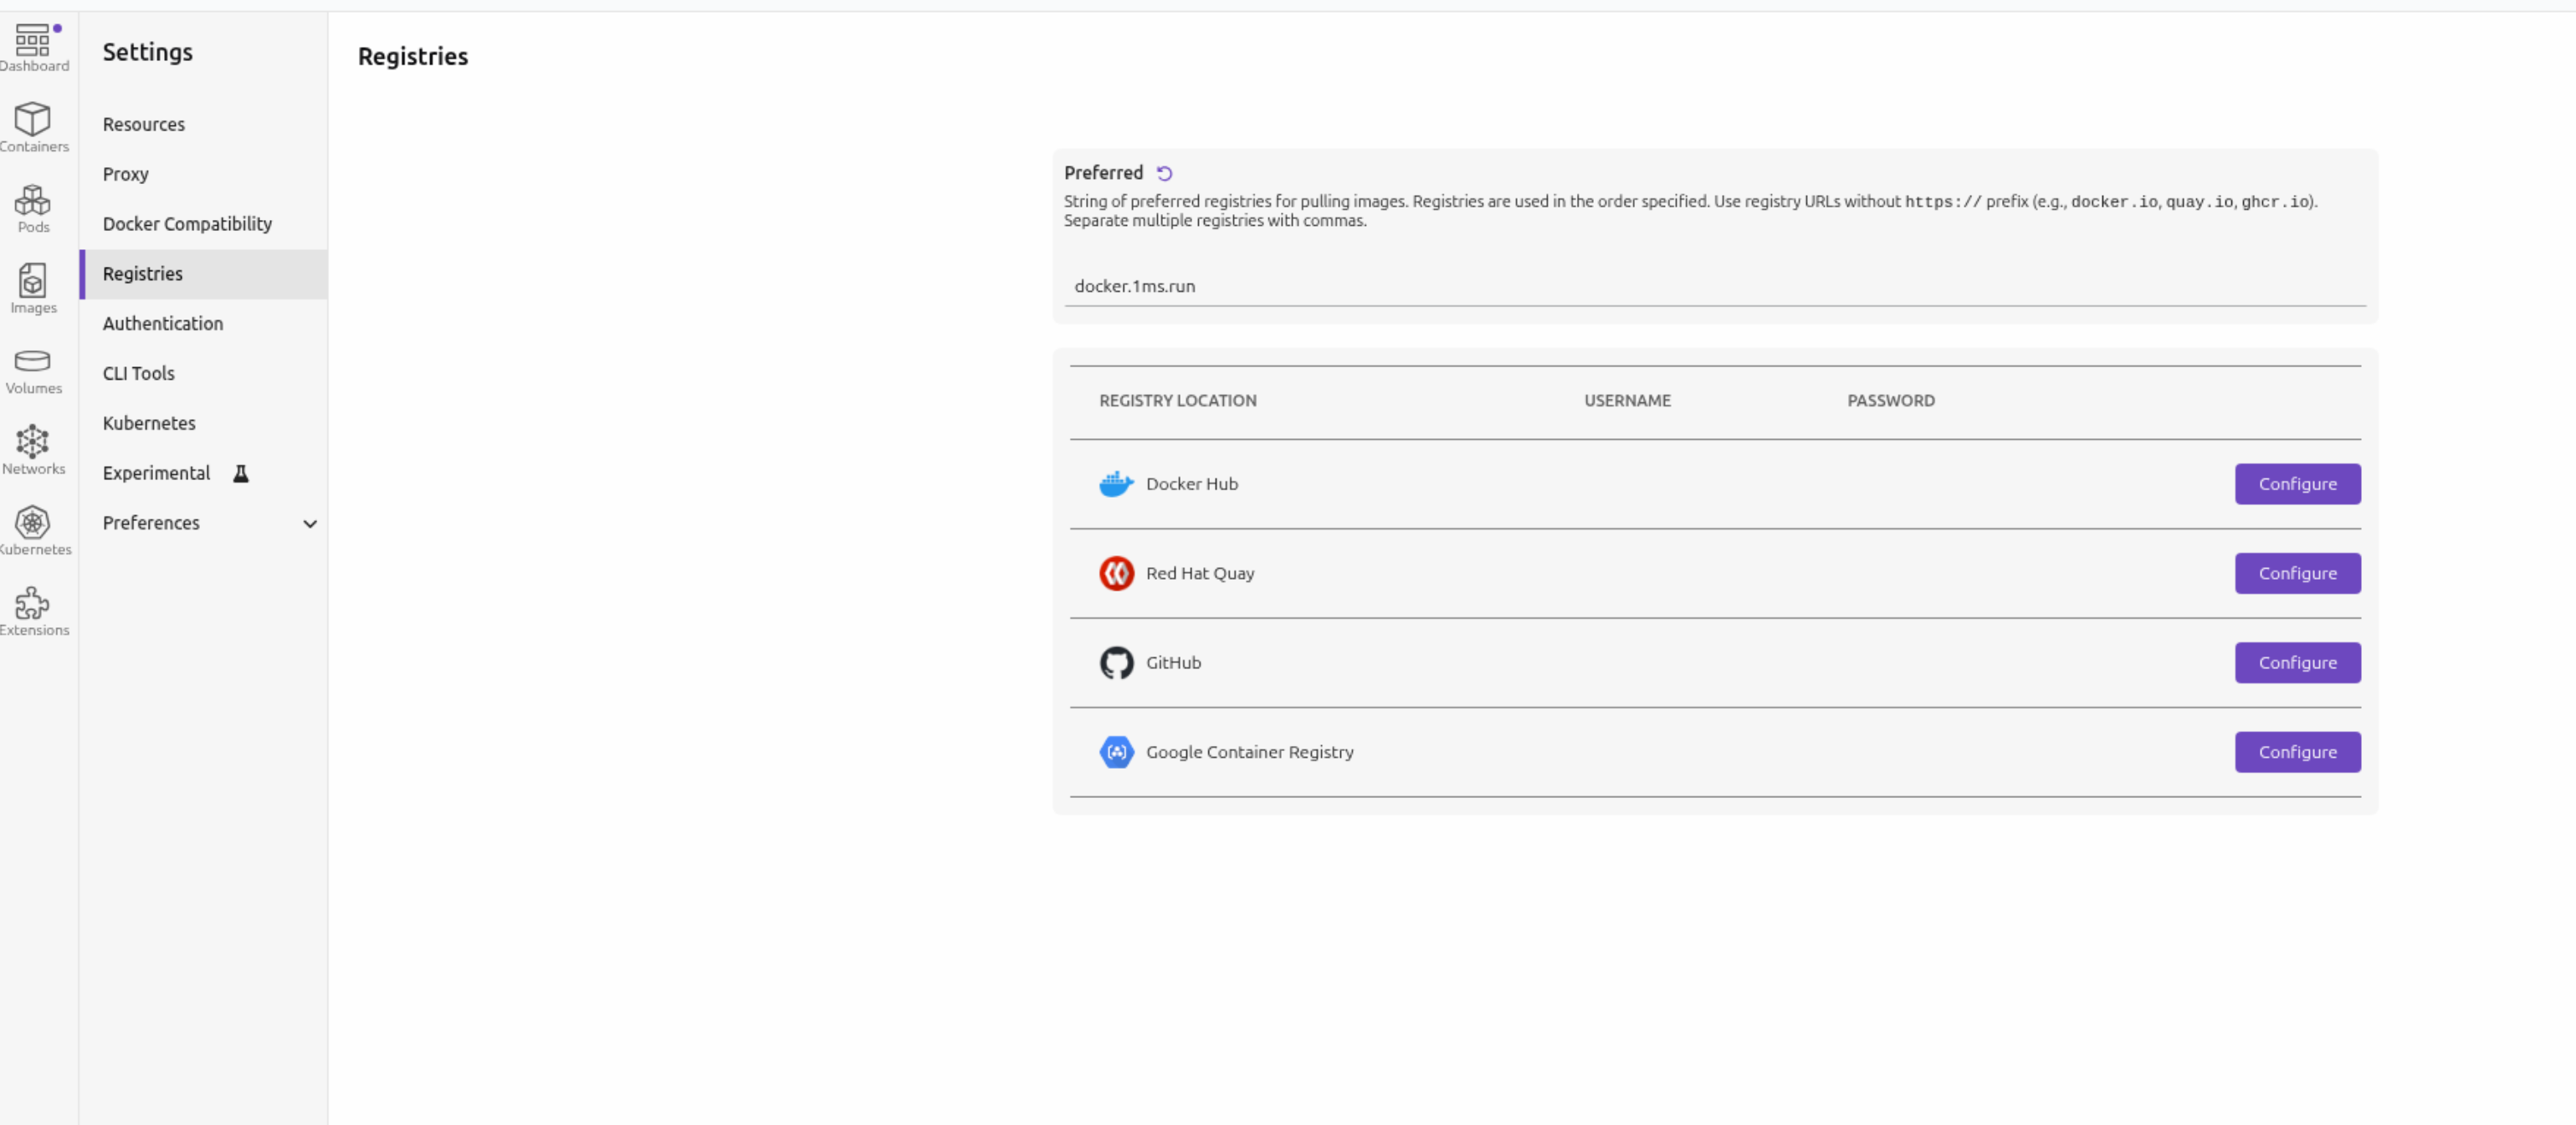
- 安装 podman desktop
- 替换国内源在 podman desktop 设置 registries 中的 Preferred 为 docker.1ms.run
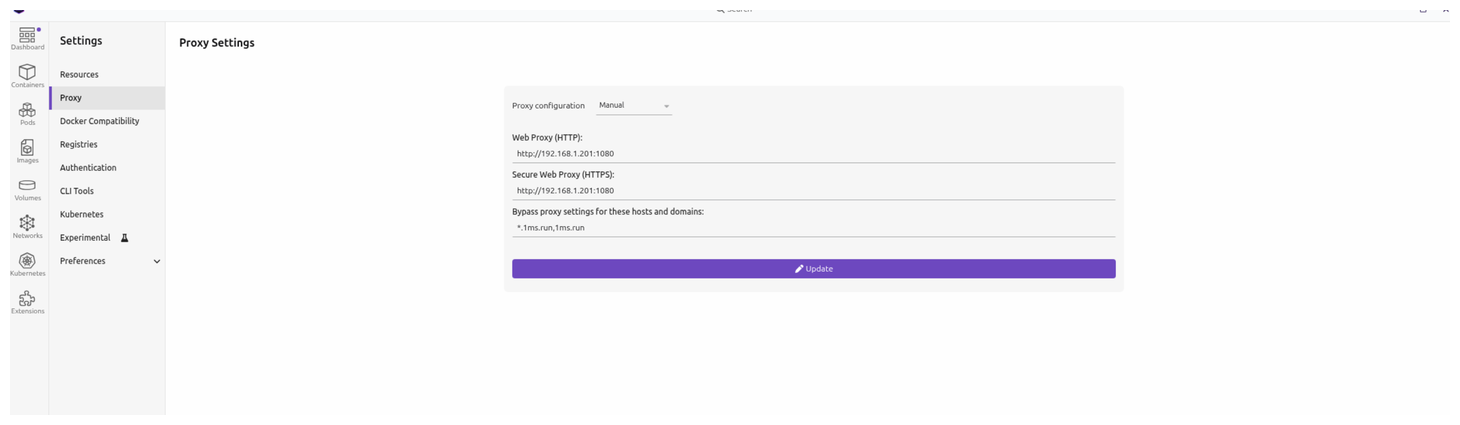
- (可选步骤)在更换源之后, 如果在拉取镜像时还是有点慢. 那么说明podman desktop 还是默认去查找了 docker.io, 需要配置代理加速.

- 可以在image功能中去拉取镜像, 输入镜像名即可搜索相关镜像.
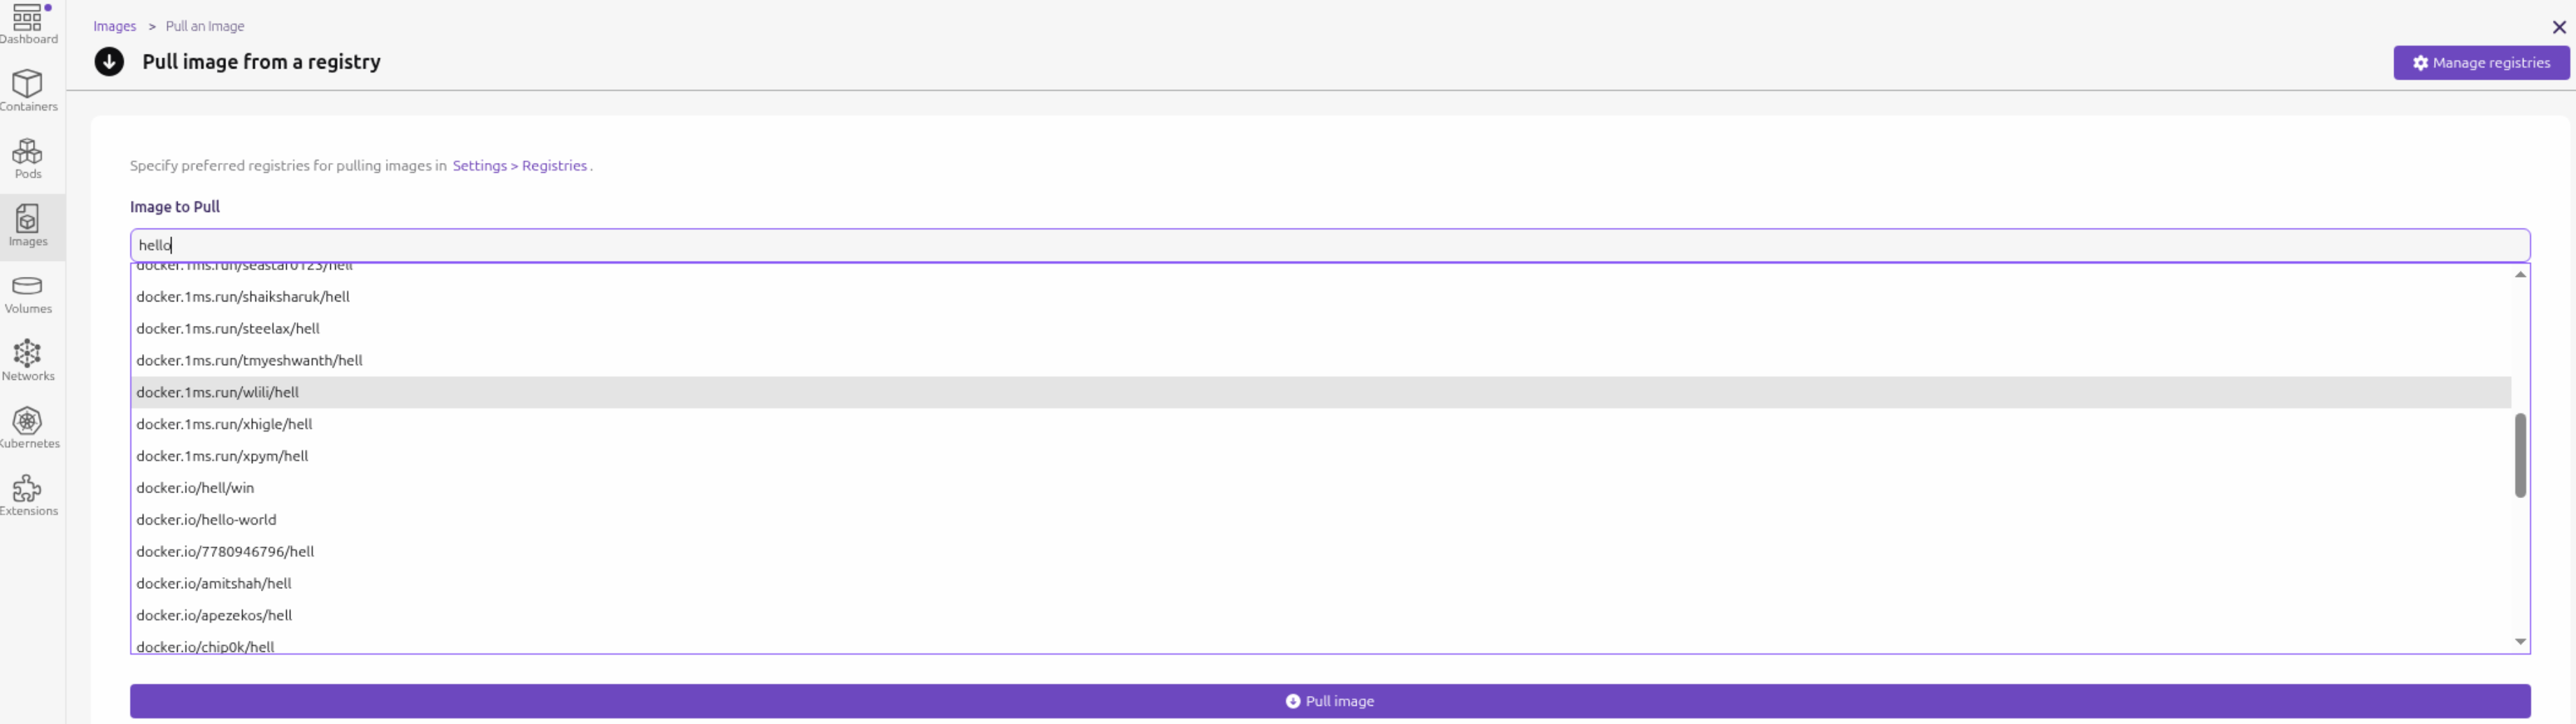
这里没有配置 docker.io 源,但是还是去搜索了docker.io, 这个行为特别奇怪. 如果原来的机器没有安装 docker, 似乎就不会去搜索docker.io. 恰好 docker.io 在国内被禁,所以不配置代理,这里搜索镜像会长时间不可用直到超时.
注意: 在 podman desktop 中配置的 registries 不会影响命令行中的命令. 命令行中使用 podman pull <镜像名> 时还需要去设置. 请参考 镜像源
install
ubuntu
sudo apt install podman
podman 是一个 rootless 的容器管理系统,基本功能和 docker 类似. 相对比docker的优势 Podman vs Docker 2026: Security, Performance & Which to Choose:
- 默认提供 rootless 且无守护进程(daemon), 安全性好
- 提供 pod 的概念,更容易和k8s之类的容器编排调度系统集成
- 完全开源, 提供了兼容 docker 的标准的容器格式规范
podman compose in ubuntu
注意, 不要使用 apt install podman-compose 来安装, 这样不是最新版本.
使用如下步骤单独安装 podman-compose 最新的 standalone 版本:
curl -o ~/.local/bin/podman-compose https://raw.githubusercontent.com/containers/podman-compose/main/podman_compose.py
chmod +x ~/.local/bin/podman-compose
查看 podman 和 podman-compose的版本:
ryefccd@republic:~/brde$ podman compose --version
>>>> Executing external compose provider "/home/ryefccd/.local/bin/podman-compose". Please see podman-compose(1) for how to disable this message. <<<<

podman-compose version 1.5.0
podman version 5.4.1
确定 podman compose 的 provider “/home/ryefccd/.local/bin/podman-compose” 是来自我们上面手动安装即可。
win11
安装好 wsl2 和 podman, podman desktop之后,按如下步骤修改相关配置:
初始化 podman 虚拟机
podman machine init
先拉镜像查看命令行关于镜像源的输出:
podman pull haproxy
Resolving "haproxy" using unqualified-search registries (/etc/containers/registries.conf.d/999-podman-machine.conf)
Trying to pull docker.io/library/haproxy:latest...
可以看到镜像是从 docker.io 拉取,配置文件位置是 (/etc/containers/registries.conf.d/999-podman-machine.conf
登录到 podman 虚拟机修改此文件
podman machine ssh
在虚拟机内修改镜像源
[user@LAPTOP-FSLMG090 ~]$ sudo sed -i 's/docker.io/docker.1ms.run/g' /etc/containers/registries.conf.d/999-podman-machine.conf
同时,podman镜像对一些知名镜像还做了别名设置,其中设置的源优先级高于上面的默认配置,也需要将其中的 docker.io 修改为我们配置的源.
[user@LAPTOP-FSLMG090 ~]$ sudo sed -i 's/docker.io/docker.1ms.run/g' /etc/containers/registries.conf.d/000-shortnames.conf
podman compose in windows
powershell 中执行下列命令:
# windows 安装 podman-compose
pip install podman-compose
# docker-compose.exe 优先级高于 podman-compose, 所以需要删除 docker-compose.exe
Remove-Item "$(where.exe docker-compose.exe)" -Force
macos
在macOS 上 使用Homebrew 安装qemu(这是 Podman 在 macOS 上运行所必需的虚拟化工具。)
brew install qemu
在 macOS 上使用 Homebrew 安装 Podman
brew install podman
初始化一个新的 Podman 虚拟机(由于 Podman 运行在虚拟机中,因此在 macOS 上需要此步骤)
podman machine init
启动 Podman 虚拟机
podman machine start
命令验证安装是否成功
podman info
验证连接
podman system connection list
安装podman-compose 使得compose执行指令是用的podman的指令而不是docker的指令
brew install podman-compose
登录到 podman 虚拟机修改镜象源
podman machine ssh


把下面这个变量改成如下配置并保存退出
sudo vi /etc/containers/registries.conf.d/999-podman-machine.conf
unqualified-search-registries = ["docker.1ms.run"]

如果还不行,可把下面文件配置也修改一下保存退出
sudo vi /etc/containers/registries.conf
unqualified-search-registries = ["docker.1ms.run"]
需要执行指令可参考如下指令(podman-compose来执行,避免compose指令在同时安装了docker和podman的环境中被识别成docker指令)
podman-compose -f compose.yml up -d
image
podman pull redis
直接拉取镜像会报错:
ryefccd@republic:~$ podman pull redis
Error: short-name "redis" did not resolve to an alias and no unqualified-search registries are defined in "/etc/containers/registries.conf"
解决方案有两个:
-
指定某个可以使用的源
podman pull docker.1ms.run/library/postgres:16 -
因为国内的docker镜像源不可使用,所以需要更换国内可以使用的源: https://1ms.run/ 具体配置参考下一节镜像源
镜像源
修改podman国内镜像源(兼容docker)
# 在此文件增加源的配置
sudo vim /etc/containers/registries.conf
# # An array of host[:port] registries to try when pulling an unqualified image, in order.
# unqualified-search-registries = ["example.com"]
unqualified-search-registries = ["docker.1ms.run"]
可以使用sed在文件最后添加 unqualified-search-registries = ["docker.1ms.run"]配置:
sudo sed -i '$a \unqualified-search-registries = ["docker.1ms.run"]' /etc/containers/registries.conf
设置完源以后,就可以直接使用镜像名字下载了
podman pull postgres:16 podman pull postgres:latest podman pull ubuntu
注意: 如果在更换 unqualified-search-registries 之后还是 去 docker.io拉取某些镜像时, 如下所示.
ryefccd@republic:~$ podman pull node
Resolved "node" as an alias (/etc/containers/registries.conf.d/shortnames.conf)
Trying to pull docker.io/library/node:latest...
WARN[0060] Failed, retrying in 1s ... (1/3). Error: initializing source docker://node:latest: pinging container registry registry-1.docker.io: Get "https://registry-1.docker.io/v2/": dial tcp 103.252.115.221:443: i/o timeout
这个表示node在 (/etc/containers/registries.conf.d/shortnames.conf) 设置了别名:
...
  # node
  "node" = "docker.io/library/node"
那么需要把此 shortnames .conf 别名设置中的 docker.io 都替换成 docker.1ms.run. 具体操作请参看 镜像别名(shortnames)
container
podman pull docker.1ms.run/library/postgres:16
创建容器
podman run --name pg16 -e POSTGRES_USER=postgres -e POSTGRES_PASSWORD=fccdjny -p 5432:5432 -d postgres
创建容器容器指定网络
podman run -d --name my-container --network my-network nginx
创建网络请参考: 创建网络
exec
非交互式运行:
podman exec pg16 date
交互式运行:
进入一个正在运行的容器中的shell,用于调试
podman exec -it pg16 bash
-i 表示交互式操作 -t 表示使用一个 terminal 终端
操作此pg16容器中的psql客户端
podman exec -it pg16 psql -U postgres
attach
把一个容器以交互式后台运行后,容器正在运行:
podman run -itd --name a1 alpine:latest sh
podman run -itd --name n1 nginx bash
可以通过 podman ps 看到这个正在后台运行交互式shell的容器,可以通过 attach 命令重新去控制这个shell:
ryefccd@republic:~$ podman attach a1
/ # cat /etc/issue
Welcome to Alpine Linux 3.23
Kernel \r on \m (\l)

/ #
注意,在attach的shell中如果执行 exit 那么容器便退出了。如果只是希望退出当前的shell控制,而不是让容器退出,不要输入 exit,要输入 ==Ctrl-P Ctrl-Q== 来退出attach的容器.
network
podman 在ubuntu中默认的桥接网络配置文件: /etc/cni/net.d/87-podman-bridge.conflist
{
  "cniVersion": "0.4.0",
  "name": "podman",
  "plugins": [
    {
      "type": "bridge",
      "bridge": "cni-podman0",
      "isGateway": true,
      "ipMasq": true,
      "hairpinMode": true,
      "ipam": {
        "type": "host-local",
        "routes": [{ "dst": "0.0.0.0/0" }],
        "ranges": [
          [
            {
              "subnet": "10.88.0.0/16",
              "gateway": "10.88.0.1"
            }
          ]
        ]
      }
    },
    {
      "type": "portmap",
      "capabilities": {
        "portMappings": true
      }
    },
    {
      "type": "firewall"
    },
    {
      "type": "tuning"
    }
  ]
}
查看podman的网络配置
Basic Networking Guide for Podman
podman network ls
ryefccd@republic:~$ podman network ls
NETWORK ID    NAME        DRIVER
2f259bab93aa  podman      bridge
查看 podman 网络设置中名为 podman 的网桥配置
podman network inspect podman
ryefccd@republic:~$ podman network inspect podman
[
     {
          "name": "podman",
          "id": "2f259bab93aaaaa2542ba43ef33eb990d0999ee1b9924b557b7be53c0b7a1bb9",
          "driver": "bridge",
          "network_interface": "podman0",
          "created": "2026-01-06T14:29:56.005594914+08:00",
          "subnets": [
               {
                    "subnet": "10.88.0.0/16",
                    "gateway": "10.88.0.1"
               }
          ],
          "ipv6_enabled": false,
          "internal": false,
          "dns_enabled": false,
          "ipam_options": {
               "driver": "host-local"
          }
     }
]
如文件所示: dns_enabled : false 表示未开启dns解析. 所以不能通过容器名字去在网络访问容器. 如果需要开启容器名字的dns解析,请参考下一节.
通过容器名字作为域名解析
查看 podman 默认的网络配置, 这个配置默认是保存在内存中的.
podman network inspect podman | jq .[] > ~/.local/share/containers/storage/networks/podman.json
如果需要修改, 需要把此配置导出 ~/.local/share/containers/storage/networks/podman.json 文件, 修改其中的dns_enabled的配置开启,重启容器即可通过容器名字访问(ping).
{
...
	"dns_enabled": true,
...
}
alpine 镜像带有ping命令
准备一个带有 ping 命令的容器
podman pull alpine podman run -d –network podman –name a1 alpine sleep infinity
ubuntu容器设置icmp数据包权限
ubnutu 容器如果需要 ping 命令,需要单独设置 ICMP 数据包的权限
podman pull ubuntu podman run -d –cap-add=NET_RAW –name ub ubuntu sleep infinity podman run -itd –cap-add=NET_RAW –name ub ubuntu bash
podman run -d –network podman –name a1 alpine sleep infinity podman run -d –network podman –name a2 alpine sleep infinity podman run -d –name a3 alpine sleep infinity
podman inspect -f ‘{{.NetworkSettings.IPAddress}}’ a1 podman inspect -f ‘{{.NetworkSettings.IPAddress}}’ a2 podman inspect -f ‘{{.NetworkSettings.IPAddress}}’ a3
可以看到 a1 和 a2 容器都分配了ip. a3 没有分配ip, 这是因为podman 创建容器需要显示的传递网络配置才能分配ip和容器名作为域名访问.
ryefccd@republic:~$ podman inspect -f '{{.NetworkSettings.IPAddress}}' a1
10.88.0.2
ryefccd@republic:~$ podman inspect -f '{{.NetworkSettings.IPAddress}}' a2
10.88.0.3
ryefccd@republic:~$ podman inspect -f '{{.NetworkSettings.IPAddress}}' a3
podman exec a1 ping -c 3 a2
ryefccd@republic:~$ podman exec a1 ping -c 3 a2
PING a2 (10.88.0.11): 56 data bytes
64 bytes from 10.88.0.11: seq=0 ttl=42 time=0.049 ms
64 bytes from 10.88.0.11: seq=1 ttl=42 time=0.107 ms
64 bytes from 10.88.0.11: seq=2 ttl=42 time=0.116 ms

--- a2 ping statistics ---
3 packets transmitted, 3 packets received, 0% packet loss
round-trip min/avg/max = 0.049/0.090/0.116 ms
给容器一个固定ip
podman run -d –network podman –ip 10.88.0.6 –name a6 alpine sleep infinity podman run -d –network podman –ip 10.88.0.7 –name a7 alpine sleep infinity
创建网络
Subnet: Specify a custom IP rangenet
podman network create --subnet 192.168.10.0/24 net192

podman network create --subnet 10.0.0.0/24 --ip-range 10.0.0.100-10.0.0.200 my-custom-net
Gateway: Define the gateway IP for the network
podman network create --gateway 192.168.10.1 custom-net
Driver: Choose a specific network driver, such as macvlan or ipvlan (rootful only)
podman network create -d macvlan -o parent=eth0 macvlan-net
Internal: Create a network that is isolated from the host and external internet
podman network create --internal private-net
注意, 新创建的网络默认开启了 dns_enabled: true 的配置
ryefccd@republic:~$ podman network inspect net192
[
     {
          "name": "net192",
          "id": "fdc405841b2ed10679ffe3eacf9e6780af8f852bd9cd27e11355ed3eb751383b",
          "driver": "bridge",
          "network_interface": "podman3",
          "created": "2026-01-07T15:29:51.040501876+08:00",
          "subnets": [
               {
                    "subnet": "192.168.10.0/24",
                    "gateway": "192.168.10.1"
               }
          ],
          "ipv6_enabled": false,
          "internal": false,
          "dns_enabled": true,
          "ipam_options": {
               "driver": "host-local"
          }
     }
]
用此网络设备的容器都可以通过容器名互相访问(ping)了.
podman desktop
完成安装后可以在桌面程序上管理容器, pod, 网络和存储卷,也能和k8s进行交互.
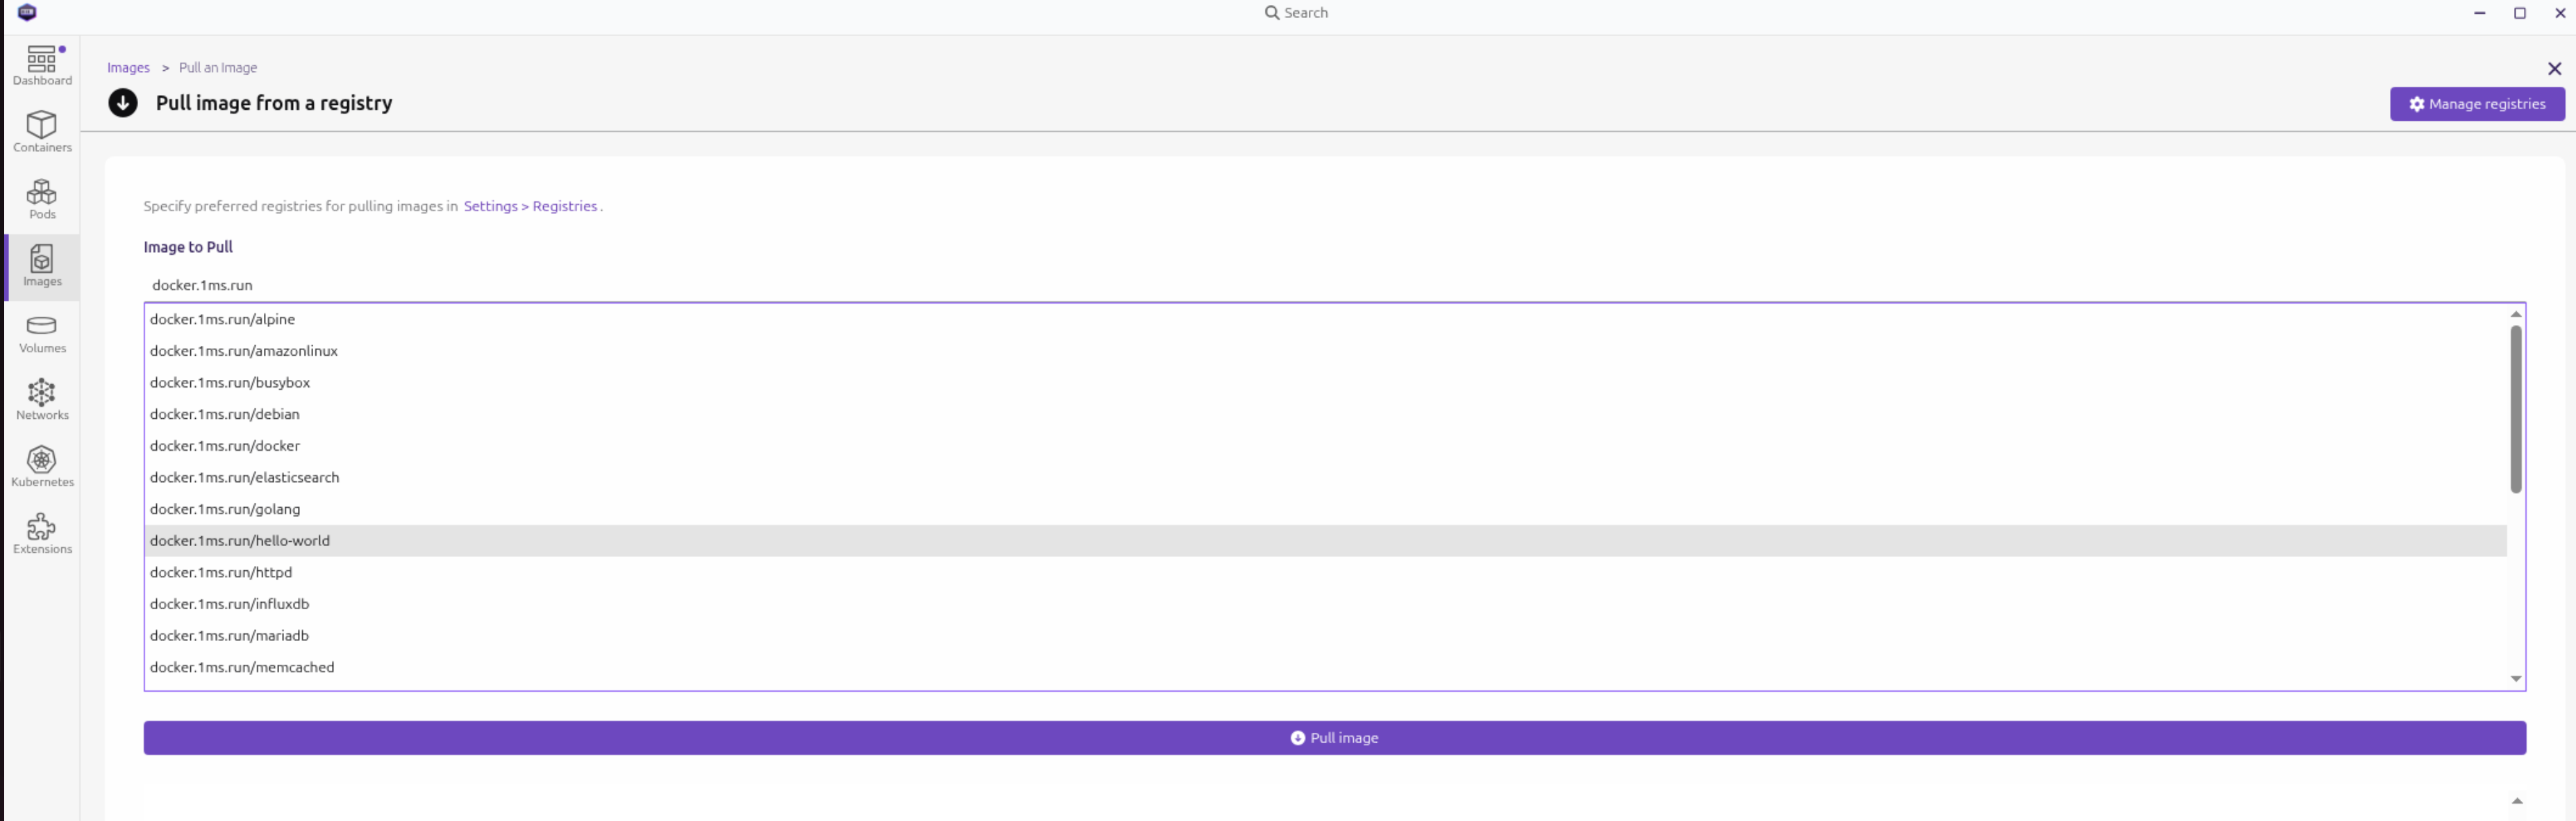
在拉取镜像时直接指定 registry 的域名也可以在其中搜索镜像. 如下图所示, 输入 docker.1ms.run 搜索此源镜像:
下面是 /etc/containers/registries.conf 配置中提到的为什么镜像使用全限定名称的原因.
note: risk of using unqualified image names
We recommend always using fully qualified image names including the registry
server (full dns name), namespace, image name, and tag
(e.g., registry.redhat.io/ubi8/ubi:latest). Pulling by digest (i.e.,
quay.io/repository/name@digest) further eliminates the ambiguity of tags.
When using short names, there is always an inherent risk that the image being
pulled could be spoofed. For example, a user wants to pull an image named
foobar from a registry and expects it to come from myregistry.com. If
myregistry.com is not first in the search list, an attacker could place a
different foobar image at a registry earlier in the search list. The user
would accidentally pull and run the attacker’s image and code rather than the
intended content. We recommend only adding registries which are completely
trusted (i.e., registries which don’t allow unknown or anonymous users to
create accounts with arbitrary names). This will prevent an image from being
spoofed, squatted or otherwise made insecure. If it is necessary to use one
of these registries, it should be added at the end of the list.
podman compose
podman-compose兼容 docker-compose, 用来做多容器编排管理.
默认文件是 compose.yaml, compose.yml, docker-compose.yaml or docker-compose.yml
podman compose up -d
如果是以其他文件命名, 可以使用 -f 来指定相关编排文件
podman compose -f my-alternative-name.yml up
只更新其中一个容器, 比如haproxy:
podman compose up -d --force-recreate haproxy
多仓库编排
https://docs.docker.com/reference/compose-file/build/#context
示例
postgresql 容器
Running PostgreSQL with Podman
atlasgo 数据库模式变更管理
apt install podman podman-docker
sudo apt install podman podman-docker
podman 是一个 rootless 的容器管理系统,基本功能和 docker 类似. 只是默认提供 rootless 的模式,安全性比较好. podman-docker 会在 $PATH 路径下设置一个 docker 的脚本命令,实际也是指向 podman 的执行文件. 这个库目的是兼容 docker 去适配一些开发工具行为。比如我们使用的 atlasgo 这个用于管理数据库表字段变更的工具.
atlas migrate diff –env sqlalchemy –dev-url “docker://postgres/16”
此处的 docker://postgres/16 会在命令运行时使用 docker 命令程序去运行 postgres:16 的镜像来做数据库模式变更迁移.
参考
ubuntu podman 容器服务被其他主机访问(防火墙)
除了要使用 -p 将容器端口曝露到主机端口上,还需要在主机上配置防火墙,给服务端口放行. 比如为了给 haproxy 计数器服务的容器所在的主机曝露服务,需要运行以下脚本:
sudo ufw status          # 查看防火墙规则
sudo ufw allow 8888/tcp  # 将本机器8888端口曝露给网络上其他机器访问
UFW: Uncomplicated Firewall — Cheat Sheet
docker 镜像源
境内 Docker 镜像状态监控
毫秒镜像 - 专为中国开发者提供的专业容器仓库服务
docker 的配置文件(/etc/docker/daemon.json):
{
  "registry-mirrors": ["docker.1ms.run", "https://mirror.gcr.io",]
}
镜像别名(shortnames)
在 shortnames.conf 文件中还有一些别名设置,检测到某些常用的软件镜像直接就指定了查找源,因为国内的 docker 域名不能访问,所以也需要替换
~$ podman pull hello-world
Resolved "hello-world" as an alias (/etc/containers/registries.conf.d/shortnames.conf)
Trying to pull docker.io/library/hello-world:latest...
...

  # docker
  "alpine" = "docker.io/library/alpine"
  "docker" = "docker.io/library/docker"
  "registry" = "docker.io/library/registry"
  "hello-world" = "docker.io/library/hello-world"
...

# Ubuntu
  "ubuntu" = "docker.io/library/ubuntu"
  # Oracle Linux
  "oraclelinux" = "container-registry.oracle.com/os/oraclelinux"
  # busybox
  "busybox" = "docker.io/library/busybox"
  # php
  "php" = "docker.io/library/php"
  # python
  "python" = "docker.io/library/python"
  # node
  "node" = "docker.io/library/node"
...
查看替换结果:
sed 's/docker.io/docker.1ms.run/g' /etc/containers/registries.conf.d/shortnames.conf
在原文件直接替换:
sudo sed -i 's/docker.io/docker.1ms.run/g' /etc/containers/registries.conf.d/shortnames.conf
替换后结果如下:
...

  # docker
  "alpine" = "docker.1ms.run/library/alpine"
  "docker" = "docker.1ms.run/library/docker"
  "registry" = "docker.1ms.run/library/registry"
  "hello-world" = "docker.1ms.run/library/hello-world"
...

# Ubuntu
  "ubuntu" = "docker.1ms.run/library/ubuntu"
  # Oracle Linux
  "oraclelinux" = "container-registry.oracle.com/os/oraclelinux"
  # busybox
  "busybox" = "docker.1ms.run/library/busybox"
  # php
  "php" = "docker.1ms.run/library/php"
  # python
  "python" = "docker.1ms.run/library/python"
  # node
  "node" = "docker.1ms.run/library/node"
...
wsl2 proxy 设置
windows 中使用 podman 需要使用 wsl2 作为 podman machine. 在windows 中 C:\Users${USER} 创建 .wslconfig 文件并写入以下配置识别系统代理
[experimental]
autoMemoryReclaim=gradual
networkingMode=mirrored
dnsTunneling=true
firewall=true
autoProxy=true
EXPOSE vs. PUBLISH (-p)
It is crucial to understand that EXPOSE is different from publishing a port using the -p or --publish flag with the docker run command:
EXPOSE(Dockerfile instruction): Declares an internal container port. It is a build-time instruction that sets metadata.PUBLISH(-pflag): Maps a specific port on the host machine to a port inside the container at runtime, making the service accessible from the outside world.
You can publish any container port using -p, even if it is not listed in the EXPOSE instruction in the Dockerfile.
nginx in container
What is the difference between nginx daemon on/off option?
In Docker, nginx -g 'daemon off;' is the standard and recommended way to run NGINX in the foreground, which ensures that the Docker container remains running.
Why daemon off is necessary in Docker
Docker operates on the principle that one container runs one foreground process (PID 1).
- Standard NGINX behavior: By default, NGINX runs as a daemon (
daemon on), which means the initial process quickly spawns worker processes in the background and then exits. - Docker’s reaction: If the primary process (PID 1) exits, Docker assumes the container’s task is complete and stops the container immediately.
- The solution: Setting
daemon off;tells NGINX to stay in the foreground, becoming the primary process that Docker monitors. As long as NGINX is running, the container stays alive.
How to use daemon off
You can configure NGINX with daemon off in a few ways:
-
In a
Dockerfile: Modify your NGINX configuration file (nginx.conf) to include the directive, or pass it as a command-line argument in theCMDinstruction. The official NGINX Docker images handle this automatically in their entrypoint scripts, but if you provide a customCMDorENTRYPOINT, you may need to explicitly include it.dockerfile
# Example Dockerfile snippet CMD ["nginx", "-g", "daemon off;"] -
In a
docker runcommand:bash
docker run -d --name my-nginx -p 8080:80 nginx:latest nginx -g 'daemon off;' -
In a
docker-compose.yamlfile:yaml
services:
  web:
    image: nginx:latest
    ports:
      - "8080:80"
    command: [nginx, '-g', 'daemon off;']
windows podman compose
# windows 安装 podman-compose
# echo "$(where.exe podman-compose)"
pip install podman-compose

# docker-compose.exe 优先级高于 podman-compose, 所以需要删除 docker-compose.exe
Remove-Item "$(where.exe docker-compose.exe)" -Force
# Remove-Item "$HOME\\AppData\\Local\\Microsoft\\WindowsApps\\docker-compose.exe" -Force
# Remove-Item "C:\\Users\\RYefccd\\AppData\\Local\\Microsoft\\WindowsApps\\docker-compose.exe" -Force
git url with branch
# Clone a specific branch directly
git clone -b develop https://github.com/octocat/Spoon-Knife.git
# Or for some tools:
git clone https://github.com/octocat/Spoon-Knife.git#develop
# npm package
some-package@git+https://github.com/user/repo.git#your-branch-name